Introduction Of Ms Word
Microsoft word is application software developed by Microsoft Inc. Microsoft Word 2016 is a word processing application that allows you to create a variety of documents, including letters, resumes, and more. It is word processing software. Microsoft Word is used to create, edit, print, and share professional-looking documents such as applications, forms, templates, business cards, letters, paper, reports, and booklets by using Microsoft Word.
Functional Bars in Ms-word:-
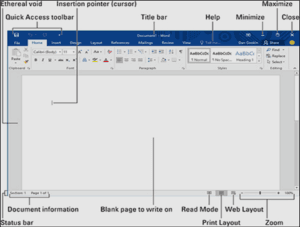
Title Bar: – The title bar is on the top of the window when you open a Microsoft Word application. The title bar contains opened application name (Microsoft Word in this case), by default file name (document1) in the center, control buttons (close, maximize, minimize) in right side and quick access tools (word logo, save, undo-redo function) on the left side.
Menu Bar: – Menu bar contains all the menus such as File, Home, and Insert, Page Layout, etc. These menus and functions are tools that are used to create all kinds of professional-looking documents in Microsoft Word.
Standard Formatting Bar (Sub Menu): – These are the category of functions and features dived under Menus according to their use. Such as under Home Menu, you can find Clip Board, Font, Paragraph, etc. these are subcategories of Main Menu Bar.
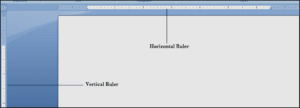
Ruler Bar: – Ruler bar is most important to understand. A rule bar is used to align the document. You can set margin and paragraph spaces by using it. You can find left indent, the right indent in the ruler bar. This is used to align the documents, page margins so when you print the document it will look professional. There are two rule bars in Microsoft Word, one is on the top of the white page(typing area) and the second is on the left side.
Scrolling Bar: – Scrollbar is used to scroll the page up/down and right/left when page zoom is high or low. There are two scrolling bars. One is the horizontal bar and the second one is the vertical scrolling bar.
Status Bar: – The Status bar showcase page number, total words, selected words, etc. Its main work is the display the status of the page. You can find spelling and grammatical proofreading option in the right after page number and words. And on the right side of the status bar, there are page views, zooming options.
Basic Uses Of Microsoft Word: –
You can create, design, and edit letters, resume, bills, reports, applications, forms, birthday cards, business cards, calendars, books, articles, assignments in Microsoft Word and you can also share them with your friends and also in public. And one more feature you can work with your team members in real-time on the same document. In Ms Word there are pre-designed templates that you can use to create various kinds of personal and official documents.
The Word interface
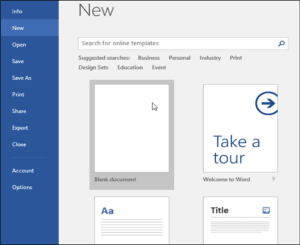
When you open Word for the first time, the Start Screen will appear. From here, you’ll be able to create a new document, choose a template, and access your recently edited documents. From the Start Screen, locate and select Blank document to access the Word interface.
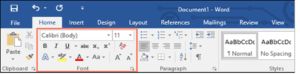
The Ribbon
- Word uses a tabbed Ribbon system instead of traditional menus. The Ribbon contains multiple tabs, which you can find near the top of the Word window.
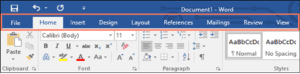
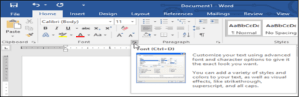
- Each tab contains several groups of related commands. For example, the Font group on the Home tab contains commands for formatting text in your document.
- Some groups also have a small arrow in the bottom-right corner that you can click for even more options.
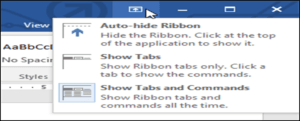
Showing and hiding the Ribbon
If you find that the Ribbon takes up too much screen space, you can hide it. To do this, click the Ribbon Display Options arrow in the upper-right corner of the Ribbon, then select the desired option from the drop-down menu:
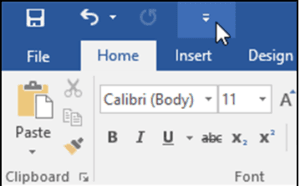
The Quick Access Toolbar
Located just above the Ribbon, the Quick Access Toolbar lets you access common commands no matter which tab is selected. By default, it shows the Save, Undo, and Redo commands, but you can add other commands depending on your needs.
To add commands to the Quick Access Toolbar:-
- Click the drop-down arrowto the right of the Quick Access Toolbar.
- Select the command you want to add from the menu.
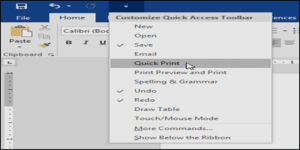
- The command will be added to the Quick Access Toolbar.

The Ruler
The Ruler is located at the top and to the left of your document. It makes it easier to adjust your document with precision. If you want, you can hide the Ruler to create more screen space.
To show or hide the Ruler:
- Click the View tab

- Click the checkbox next to Ruler to show or hide the Ruler.
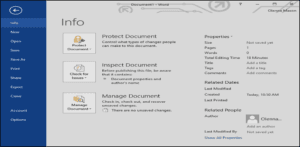
Backstage View
Backstage view gives you various options for saving, opening a file, printing, and sharing your document. To access backstage view, click the File tab on the Ribbon.

Click the buttons in the interactive below to learn more about using backstage view.
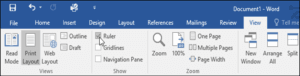
Document Views and Zooming
Word has a variety of viewing options that change how your document is displayed. You can choose to view your document in Read Mode, Print Layout, or Web Layout. These views can be useful for various tasks, especially if you’re planning to print the document. You can also zoom in and out to make your document easier to read.
Switching Document Views
Switching between different document views is easy. Just locate and select the desired document view command in the bottom-right corner of the Word window.
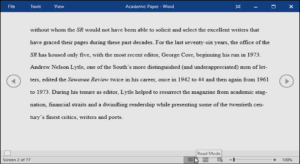
- Read Mode: This view opens the document to a full screen. This view is great for reading large amounts of text or simply reviewing your work.
- Print Layout: This is the default document view in Word. It shows what the document will look like on the printed page.
- Web Layout: This view displays the document as a webpage, which can be helpful if you’re using Word to publish content online.

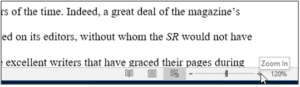
Zooming in and out:-
To zoom in or out, click and drag the zoom control slider in the bottom-right corner of the Word window. You can also select the + or – commands to zoom in or out by smaller increments. The number next to the slider displays the current zoom percentage, also called the zoom level.
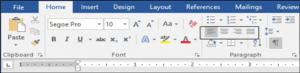
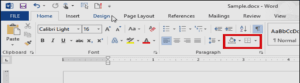
Home Tab
To change the font size:-
- Select the text you want to modify.
- On the Home tab, click the Font size drop-down arrow. Select a font size from the menu. If the font size you need is not available in the menu, you can click the Font size box and typethe desired font size, then presses Enter.
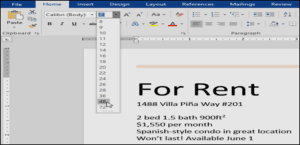
- The font size will change in the document.You can also use the Grow Font and Shrink Font commands to change the font size.

To Change The Font Type:-
By default, the font of each new document is set to Calibri. However, Word provides many other fonts you can use to customize text.
- Select the text you want to modify.
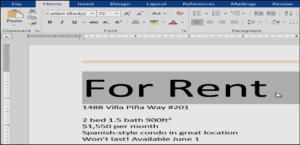
- On the Home tab, click the drop-down arrow next to the Font A menu of font styles will appear.
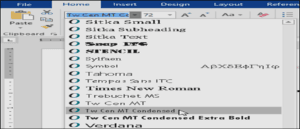
- Select the font style you want to use.
- The font will change in the document.
- When creating a professional document or a document that contains multiple paragraphs, you’ll want to select a font that’s easy to read. Along with Calibri, standard reading fonts include Cambria, Times New Roman, and Arial.
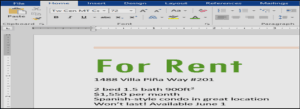
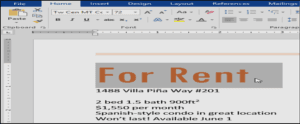
To Change The Font Color:-
- Select the text you want to modify.
- On the Home tab, click the Font Color drop-down arrow. The Font Color menu appears.
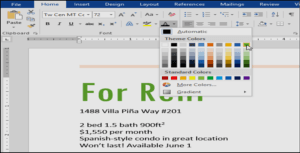
- Select the font color you want to use. The font color will change in the document.
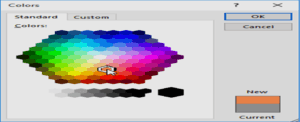
Your color choices aren’t limited to the drop-down menu that appears. Select More Colors at the bottom of the menu to access the Colors dialog box. Choose the color you want, then click OK.
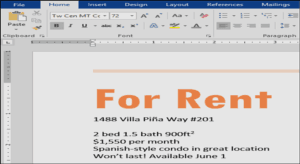
To use the Bold, Italic, and Underline commands:-
The Bold, Italic, and Underline commands can be used to help draw attention to important words or phrases.
- Select the text you want to modify.
- On the Home tab, click the Bold (B), Italic (I), or Underline (U) command in the Font group. In our example, we’ll click Bold.
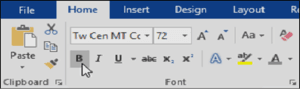
- The selected text will be modified in the document.
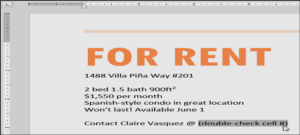
To change text case:-
When you need to quickly change text case, you can use the Change Case command instead of deleting and retyping text.
- Select the text you want to modify.
- On the Home tab, click the Change Case command in the Font.
- A drop-down menu will appear. Select the desired case option from the menu.
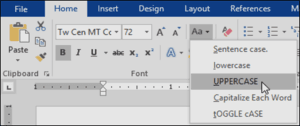
- The text case will be changed in the document.

Highlighting can be a useful tool for marking important text in your document.
- Select the text you want to highlight.
- From the Home tab, click the Text Highlight Color drop-down arrow. The Highlight Color menu appears.
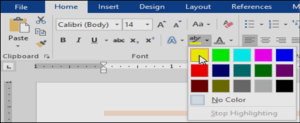
- Select the desired highlight color. The selected text will then be highlighted in the document.
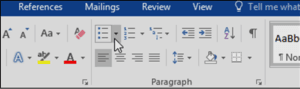
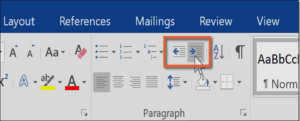
- To remove highlighting in the text, select the highlighted text, then click the Text Highlight Color drop-down arrow. Select No Color from the drop-down menu.Changing Text Alignment:-A paragraph can contain one word, one sentence, or multiple sentences. Alignment determines how any given paragraph is oriented between the left and right margins. The Paragraph Group of the Home Tab includes four alignment buttons. Click on any button or use its shortcut key to apply given alignment to the selected paragraphs.
By default, Word aligns text to the left margin in new documents. However, there may be times when you want to adjust text alignment to the center or right.
- Select the text you want to modify.
- On the Home tab, select one of the four alignment options from the Paragraph group. In our example, we’ve selected Center Alignment.

- The text will be realigned in the document.
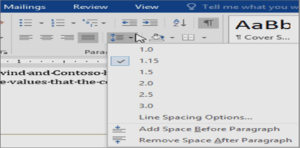
- If you want to choose other two alignments (Right, Justify),then you can click on these options in paragraph.Changing Spacing:-By default the normal paragraph style includes extra spacing after the paragraph. Pressing Enter once at the end of a paragraph automatically includes the needed spacing between the current paragraph and the next paragraph .By default normal paragraph style is set to 1.08 line spacing. You can also change line spacing in MS-Word.
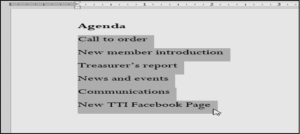
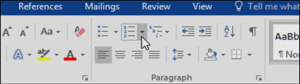
Numbering or bulleting lists of text:-
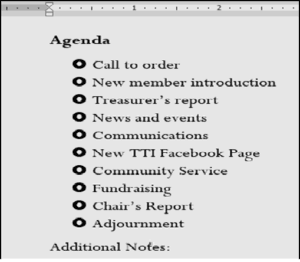
Bullet and numbering are pointers or list you want to add. For example list of fruits or you want to talk about advantages and disadvantages of certain products. You may have seen bullets in prospectus where it gives details about eligibility criteria to apply for a certain degree or course.
You can change the number or bullets style by clicking the arrow for either the numbering or bullets tool. When you move the mouse pointer over a new bullet or numbering style, a live preview appears in the selected list.
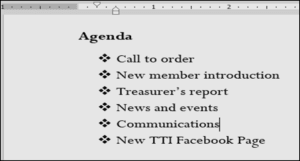
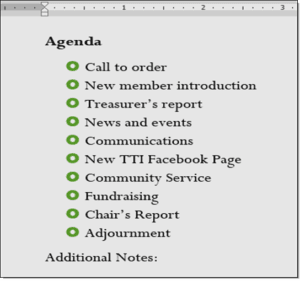
To create a bulleted list:-
- Select the text you want to format as a list.
- On the Home tab, click the drop-down arrow next to the Bullets A menu of bullet styles will appear.
- Move the mouse over the various bullet styles. A live preview of the bullet style will appear in the document. Select the bullet style you want to use.

- The text will be formatted as a bulleted list.
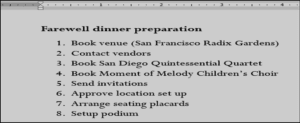
To create a numbered list:-
When you need to organize text into a numbered list, Word offers several numbering options. You can format your list with numbers, letters, or Roman numerals etc.
- Select the text you want to format as a list.
- On the Home tab, click the drop-down arrow next to the Numbering command. A menu of numbering styles will appear.
- Move the mouse over the various numbering styles. A live preview of the numbering style will appear in the document. Select the numbering style you want to use.
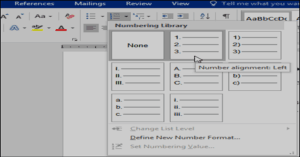
- The text will format as a numbered list.
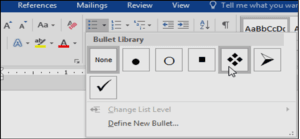
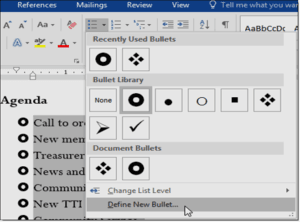
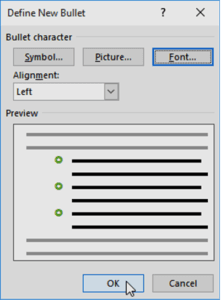
To use a symbol as a bullet:-
- Select an existing list you want to format.
- On the Home tab, click the drop-down arrow next to the Bullets command. Select Define New Bullet from the drop-down menu.
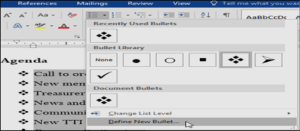
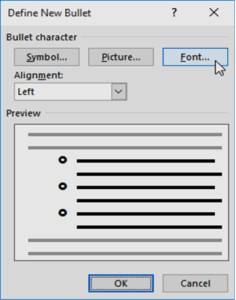
- The Define New Bullet dialog box will appear. Click the Symbol button.
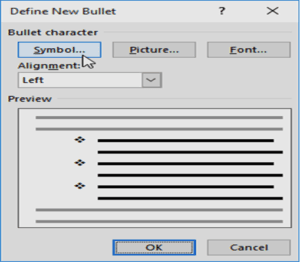
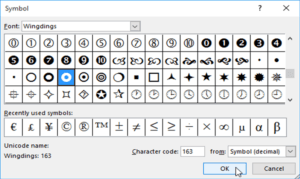
- The Symbol dialog box will appear.
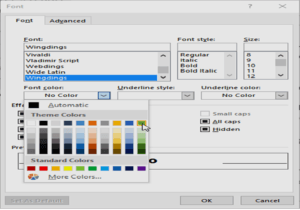
- Click the Font drop-down box and select a font. The Wingdings and Symbol fonts are good choices because they have many useful symbols.
- Select the desired symbol, and then click OK.
- The Symbol will appear in the Preview section of the Define New Bullet dialog box. Click OK.
- The symbol will appear in the list.
To change the bullet color:-
- Select an existing list you want to format.
- On the Home tab, click the drop-down arrow next to the Bullets command. Select Define New Bullet from the drop-down menu.
- The Font dialog box will appear. Click the Font Color drop-down box. A menu of font colors will appear.
- The Font dialog box will appear. Click the Font Color drop-down box. A menu of font colors will appear.
- Select the desired color, and then click OK.
- The bullet color will appear in the Preview section of the Define New Bullet dialog box. Click OK.
- The bullet color will change in the list.
Indenting Text
Indentation refers to adding extra space between one or more lines of a paragraph and the left or right margins. Indenting text adds structure to your document by allowing you to separate information. Whether you’d like to move a single line or an entire paragraph, you can use the tab selector and the horizontal ruler to set tabs and indents. In different types of documents, you may want to indent only the first line of each paragraph. This helps to visually separate paragraphs from one another. It’s also possible to indent every line except for the first line, which is known as a hanging indent. You should use indentation to indicate a new paragraph.
Border and Shading
Borders and shading help to emphasize the text in a document. Shading is a background color or pattern that fills behind a specified text or paragraph.Shading means converting a text into colored background or fill the text with specific color and in different styles to specific text or word or selected text or whole paragraph. Or highlight means to highlight some text of the paragraph to gain attention of the user.Border in a document, may be a solid line, dotted, dashed line, and made up of various objects such as flowers etc.you can apply borders to things such as paragraphs, pages, table cells etc.
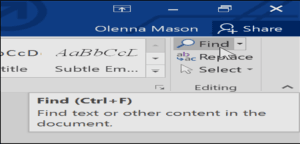
Find And Replace
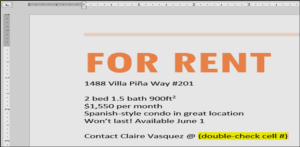
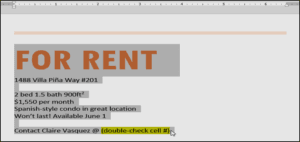
When you’re working with longer documents, it can be difficult and time consuming to locate a specific word or phrase. Word can automatically search your document using the Find feature, and it allows you to quickly change words or phrases using replace.
To replace text
At times, you may discover that you’ve made a mistake repeatedly throughout your document—such as misspelling a person’s name—or that you needs to exchange a particular word or phrase for another. You can use Word’s Find and Replace feature to quickly make revisions.
